
Booked 2.4.4 – Appointment Booking for WordPress | Calendars
## Booked – Appointment Booking for WordPress | Calendars: A Comprehensive Guide
Booked is a popular and powerful WordPress plugin designed to streamline appointment scheduling for businesses and individuals. Its flexibility and user-friendly interface make it a favorite among those looking to integrate a professional booking system directly into their website. This article provides a detailed overview of Booked, covering its features, installation, configuration, usage, and downloadable resources.
## Key Features of Booked
Booked offers a wide array of features to cater to diverse scheduling needs. Here’s a breakdown of some of its most notable functionalities:
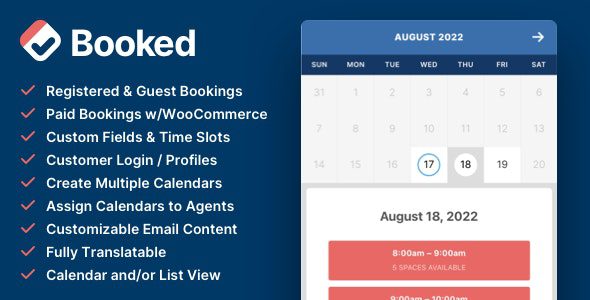
* **Appointment Scheduling:** Allows users to book appointments directly through your WordPress website.
* **Customizable Calendars:** Create multiple calendars for different services, locations, or staff members.
* **Custom Appointment Fields:** Gather specific information from clients during the booking process.
* **Time Slot Management:** Define available time slots based on your schedule and availability.
* **Multiple Appointment Bookings:** Enable clients to book multiple appointments in one session.
* **Buffer Times:** Add buffer time before or after appointments for preparation or cleanup.
* **Email Notifications:** Automatically send confirmation, reminder, and cancellation emails to clients and staff.
* **Payment Integration:** Accept online payments through various payment gateways like PayPal and Stripe.
* **User Roles:** Assign different roles and permissions to staff members to manage appointments.
* **Customer Management:** Maintain a record of customer bookings and information.
* **Google Calendar Sync:** Sync your Booked calendars with your Google Calendar for seamless integration.
* **Custom CSS:** Customize the look and feel of the booking interface to match your website’s branding.
* **Responsive Design:** Ensures the booking system works seamlessly on all devices, including desktops, tablets, and smartphones.
* **Translation Ready:** Supports multiple languages to cater to a global audience.
* **Shortcode Support:** Easily embed calendars and booking forms on any page or post using shortcodes.
* **Appointment Approval:** Manually approve appointments before they are confirmed.
* **Recurring Appointments:** Allows clients to book recurring appointments on a regular basis.
## Installing and Activating Booked
The installation process for Booked is straightforward and follows the standard WordPress plugin installation procedure:
1. **Download the Plugin:** Purchase and download the Booked plugin from CodeCanyon or the official website.
2. **Upload the Plugin:** In your WordPress dashboard, navigate to Plugins > Add New.
3. **Click “Upload Plugin”:** Click the “Upload Plugin” button at the top of the page.
4. **Choose File:** Choose the downloaded Booked plugin zip file.
5. **Install Now:** Click the “Install Now” button.
6. **Activate Plugin:** After the installation is complete, click the “Activate Plugin” button.
Once activated, you’ll see a “Booked” menu item in your WordPress dashboard.
## Configuring Booked: A Step-by-Step Guide
After installation, you’ll need to configure Booked to align with your specific booking requirements. Here’s a detailed guide:
**1. General Settings:**
Navigate to Booked > Settings. The “General” tab allows you to configure basic settings:
* **Currency Symbol:** Select your desired currency symbol.
* **Time Format:** Choose between 12-hour and 24-hour time format.
* **Date Format:** Select your preferred date format.
* **First Day of the Week:** Specify the first day of the week for the calendar.
* **Confirmation Page:** Choose the page to which users are redirected after booking an appointment.
* **Cancel Appointment Page:** Choose the page to which users are redirected when cancelling an appointment.
* **Prevent Duplicate Bookings:** Prevent users from booking multiple appointments at the same time.
* **Require Login to Book:** Require users to log in before booking an appointment.
* **Allow Guest Bookings:** Allow users to book appointments without creating an account.
* **Default Appointment Length:** Set the default length of appointments.
* **Buffer Time:** Set buffer time before or after appointments.
* **Automatically Approve Appointments:** Automatically approve appointments without manual intervention.
**2. Calendars:**
Navigate to Booked > Calendars. This section allows you to create and manage multiple calendars.
* **Add New Calendar:** Click the “Add New” button to create a new calendar.
* **Calendar Title:** Enter a descriptive title for the calendar.
* **Calendar Slug:** Enter a unique slug for the calendar (used in URLs).
* **Calendar Color:** Choose a color to visually distinguish the calendar.
* **Calendar Fields:** Add custom fields to collect specific information from clients during booking. These can include text fields, dropdown menus, checkboxes, and more.
* **Assign Users:** Assign staff members to the calendar who can manage and receive notifications for appointments.
**3. Time Slots:**
Navigate to Booked > Time Slots. This section allows you to define available time slots for each calendar.
* **Choose a Calendar:** Select the calendar for which you want to define time slots.
* **Add New Time Slot:** Click the “Add New” button to create a new time slot.
* **Day of the Week:** Select the day of the week for the time slot.
* **Start Time:** Enter the starting time for the time slot.
* **End Time:** Enter the ending time for the time slot.
* **Available Slots:** Specify the number of slots available during that time.
* **Break Time:** Add break time between appointments.
**4. Custom Fields:**
Navigate to Booked > Custom Fields. This section allows you to create and manage custom fields that will be displayed on the booking form.
* **Add New Field:** Click the “Add New” button to create a new custom field.
* **Field Label:** Enter a descriptive label for the field.
* **Field Type:** Choose the type of field (e.g., text field, dropdown, checkbox).
* **Required:** Mark the field as required if necessary.
* **Options:** For dropdown and checkbox fields, specify the available options.
**5. Emails:**
Navigate to Booked > Emails. This section allows you to customize the email notifications sent to clients and staff.
* **Enable/Disable Emails:** Enable or disable different email notifications.
* **Email Subject:** Customize the subject line of the email.
* **Email Content:** Customize the content of the email using available placeholders (e.g., {appointment_date}, {appointment_time}, {customer_name}).
* **Email Header/Footer:** Customize the header and footer of all emails.
**6. Payments:**
Navigate to Booked > Payments. This section allows you to configure payment gateways to accept online payments.
* **Enable Payments:** Enable or disable the payment functionality.
* **Payment Gateway:** Choose your preferred payment gateway (e.g., PayPal, Stripe).
* **Payment Settings:** Configure the settings for the selected payment gateway, such as API keys and currency.
* **Price per Appointment:** Set the price for each appointment.
**7. Front-End Display:**
Booked utilizes shortcodes to display calendars and booking forms on your website.
* **[booked-calendar calendar=X]**: This shortcode displays a specific calendar, where X is the calendar ID.
* **[booked-appointments]**: This shortcode displays the user’s upcoming appointments.
* **[booked-login]**: This shortcode displays the login form.
* **[booked-register]**: This shortcode displays the registration form.
Place these shortcodes on the pages or posts where you want the booking system to appear.
## Using Booked: A User Perspective
From a user’s perspective, booking an appointment with Booked should be a seamless experience. Here’s a typical workflow:
1. **Access the Calendar:** The user visits the page or post where you’ve embedded the calendar using the shortcode.
2. **Select a Date:** The user selects a date on the calendar.
3. **Choose a Time Slot:** Available time slots for the selected date are displayed. The user chooses a suitable time slot.
4. **Fill Out the Booking Form:** The user fills out the booking form, providing the necessary information requested in the custom fields.
5. **Confirm Appointment:** The user confirms the appointment details.
6. **Make Payment (if required):** If payments are enabled, the user is redirected to the payment gateway to complete the payment.
7. **Receive Confirmation:** The user receives a confirmation email with the appointment details.
## Managing Appointments
As the administrator, you can manage appointments through the Booked > Appointments section.
* **View Appointments:** View a list of all upcoming and past appointments.
* **Filter Appointments:** Filter appointments by calendar, date, or user.
* **Edit Appointments:** Edit appointment details, such as date, time, and status.
* **Cancel Appointments:** Cancel appointments and send cancellation notifications.
* **Approve Appointments:** Manually approve pending appointments.
* **Add New Appointments:** Manually add new appointments to the system.
## Troubleshooting Common Issues
While Booked is generally reliable, you might encounter some issues. Here are some common problems and their solutions:
* **Calendar Not Displaying:** Ensure you have correctly placed the shortcode `[booked-calendar calendar=X]` on the page or post, replacing X with the correct calendar ID. Also, check if the calendar is published and active.
* **Emails Not Being Sent:** Check your WordPress email settings and ensure that emails are being sent correctly. Consider using an SMTP plugin to improve email deliverability. Also, verify that the email notifications are enabled in the Booked settings.
* **Payment Issues:** Double-check your payment gateway settings and API keys. Ensure that your payment gateway account is active and properly configured.
* **Conflicting Time Slots:** Review your time slot settings and ensure there are no overlapping or conflicting time slots.
* **Plugin Conflicts:** If you suspect a plugin conflict, try deactivating other plugins one by one to identify the conflicting plugin.
## Downloadable Resources and Articles
While Booked doesn’t provide downloadable articles within the plugin itself, there are often resources available on the plugin developer’s website or within the CodeCanyon download package:
* **Documentation:** The official documentation provides detailed information about all the features and settings of Booked. This is usually the first place to look for answers to your questions.
* **Tutorials:** Video tutorials and written guides can help you learn how to use Booked effectively. Look for these on YouTube or the developer’s website.
* **FAQ:** A frequently asked questions (FAQ) section addresses common questions and issues related to Booked.
* **Support Forum:** The support forum is a place where you can ask questions and get help from other Booked users and the plugin developers.
* **Code Snippets:** The developers sometimes provide code snippets for customizing Booked functionality.
Check the CodeCanyon download page or the developer’s website for direct access to the documentation and support resources. Look for files such as “documentation.html” or “README.txt” within the downloaded plugin package. These files often contain important information and links to helpful resources.