
Store Locator (Google Maps) For WordPress 4.11.15
Store Locator (Google Maps) For WordPress: A Comprehensive Guide
WordPress, a versatile and powerful content management system, is often used for business websites. A key feature that many businesses need is a store locator. A store locator, typically powered by Google Maps, allows customers to easily find the nearest physical store location. Integrating a store locator into your WordPress website significantly enhances the user experience and can boost sales. This article explores how to implement a store locator, primarily using Google Maps, within your WordPress site, providing detailed information and actionable steps.
Why Implement a Store Locator on Your WordPress Website?
A store locator offers numerous advantages for businesses with physical locations:
- Enhanced User Experience: Customers can quickly and easily find the closest store.
- Increased Foot Traffic: By providing clear directions, you encourage more customers to visit your stores.
- Improved SEO: Store locator pages can be optimized for local search, boosting your visibility in local search results.
- Convenience: Customers can view store hours, contact information, and other relevant details in one place.
- Mobile-Friendly: Google Maps integration ensures a seamless experience on mobile devices.
- Data Collection: Analyzing store locator usage provides insights into customer behavior and popular locations.
- Competitive Advantage: A well-implemented store locator can set you apart from competitors.
Choosing the Right Store Locator Plugin
Several WordPress plugins facilitate store locator functionality. Choosing the right one depends on your specific needs and technical skills. Here are some popular options:
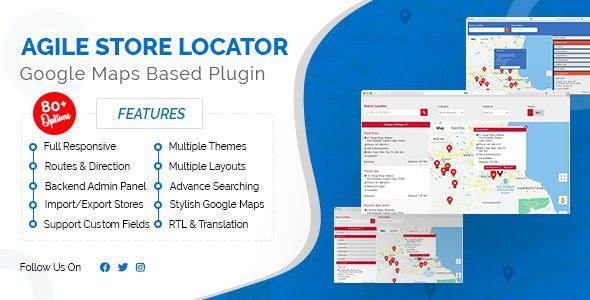
- Agile Store Locator: A feature-rich plugin with customizable map markers, category filters, and CSV import/export capabilities. It is often considered among the best choices.
- WP Store Locator: A user-friendly plugin with a simple interface, suitable for basic store locator needs. It offers custom fields and map styles.
- Store Locator Plus: A robust plugin with advanced features such as radius search, distance calculations, and Google Analytics integration.
- Locatoraid Store Locator: A modern plugin that allows for custom designs and integrates seamlessly with Google Maps. Its free version has limited options.
- Simple Store Locator: As the name suggests, it is a simple and easy-to-use option, perfect for basic needs.
When choosing a plugin, consider these factors:
- Features: Does the plugin offer the features you need, such as custom map markers, search filters, and distance calculations?
- Ease of Use: Is the plugin easy to install, configure, and manage?
- Customization: Can you customize the appearance of the map and store listings to match your brand?
- Support: Does the plugin developer offer good support in case you encounter any issues?
- Pricing: Is the plugin free or paid? What are the limitations of the free version?
- Reviews: What are other users saying about the plugin?
Setting Up Your Google Maps API Key
Most store locator plugins require a Google Maps API key to function correctly. Obtaining an API key involves the following steps:
- Go to the Google Cloud Console: Visit console.cloud.google.com.
- Create a Project: If you don’t have a project already, create one by clicking on the project dropdown at the top and selecting “New Project.” Give your project a name.
- Enable the Maps JavaScript API: In the Google Cloud Console, navigate to “APIs & Services” -> “Library.” Search for “Maps JavaScript API” and enable it.
- Enable the Geocoding API: Similarly, search for “Geocoding API” and enable it. This API is required to convert addresses into geographic coordinates.
- Create API Credentials: Navigate to “APIs & Services” -> “Credentials.” Click on “+ CREATE CREDENTIALS” and select “API key.”
- Restrict the API Key (Important for Security): Click on the pencil icon next to your newly created API key to edit it. Under “API restrictions,” select “Restrict key” and choose “Maps JavaScript API” and “Geocoding API.” This prevents unauthorized use of your API key.
- Copy the API Key: Copy the generated API key and save it securely.
It’s crucial to restrict your API key to prevent unauthorized use and unexpected charges. Monitor your Google Maps API usage regularly in the Google Cloud Console.
Installing and Configuring Your Chosen Plugin
The installation and configuration process varies slightly depending on the plugin you choose. Here’s a general outline:
- Install the Plugin: In your WordPress dashboard, go to “Plugins” -> “Add New.” Search for the plugin you chose and click “Install Now” followed by “Activate.”
- Enter Your Google Maps API Key: Navigate to the plugin’s settings page (usually found under “Settings” or a dedicated menu item in your WordPress dashboard). Locate the field for the Google Maps API key and paste the key you obtained earlier.
- Configure General Settings: Most plugins offer various settings such as the default map zoom level, map type (roadmap, satellite, hybrid, terrain), and default location. Configure these settings according to your preferences.
Adding Your Store Locations
Adding your store locations is a critical step. Most plugins provide options for adding locations manually or importing them from a CSV file.
- Manual Entry: Navigate to the plugin’s “Add New Location” or similar section. Enter the store name, address, phone number, website URL, opening hours, and any other relevant details. Some plugins allow you to add custom fields for additional information.
- CSV Import: Prepare a CSV file with columns for store name, address, latitude, longitude, phone number, website URL, and other relevant data. Consult the plugin’s documentation for the required CSV format. Upload the CSV file through the plugin’s import feature.
Ensure your store addresses are accurate and consistent. Use the same format for all addresses to avoid errors. Regularly update your store locations to reflect any changes.
Customizing the Store Locator Appearance
Customizing the appearance of your store locator is important to match your brand and create a visually appealing experience.
- Map Markers: Most plugins allow you to customize the map markers. You can use your own branded icons instead of the default Google Maps markers.
- Infoboxes: Customize the information displayed in the infoboxes that appear when a user clicks on a map marker. Include essential details such as store name, address, phone number, website URL, and opening hours.
- Map Styles: Use Google Maps styling options to change the appearance of the map. You can choose from predefined styles or create your own custom styles.
- Search Filters: Customize the search filters to allow users to search by distance, category, or other criteria.
- Layout and Design: Modify the layout and design of the store locator page to match your website’s overall design.
CSS customization is often necessary to achieve the desired look. Use your browser’s developer tools to inspect the elements and apply custom CSS rules to the plugin’s stylesheet or your theme’s stylesheet.
Optimizing Your Store Locator for SEO
Optimizing your store locator for search engines is crucial for improving your local search visibility.
- Use Relevant Keywords: Include relevant keywords in your store locator page title, meta description, and content. Focus on keywords related to your business and location, such as ” [Your Business] in [City]” or “[Your Product/Service] near me.”
- Optimize Store Pages: Create individual pages for each store location with unique content, including the store address, phone number, opening hours, and a brief description of the store.
- Use Schema Markup: Implement schema markup to provide search engines with structured data about your store locations. Use the “LocalBusiness” schema type and include relevant properties such as name, address, phone number, website URL, and opening hours.
- Mobile Optimization: Ensure your store locator is mobile-friendly and responsive. Mobile users often search for nearby businesses on their phones.
- Link Building: Build links to your store locator page from other relevant pages on your website and from external websites.
- Submit Your Business to Local Directories: Submit your business to local directories such as Google My Business, Yelp, and Bing Places for Business.
Troubleshooting Common Issues
Implementing a store locator can sometimes present challenges. Here are some common issues and their solutions:
- Map Not Displaying: This is often caused by an incorrect or missing Google Maps API key. Double-check your API key and ensure it is correctly entered in the plugin settings. Also, verify that the Maps JavaScript API and Geocoding API are enabled in the Google Cloud Console and that your API key is restricted to these APIs.
- Incorrect Store Locations: Ensure your store addresses are accurate and consistent. Use the same format for all addresses. If you are using CSV import, verify that the latitude and longitude values are correct.
- Slow Loading Times: Optimize your images and other assets to improve page loading times. Consider using a caching plugin. Also, check the plugin’s settings for any performance optimization options.
- Search Functionality Not Working: Verify that the search functionality is properly configured in the plugin settings. Check that the search radius and other search parameters are set correctly.
- Conflicts with Other Plugins: Deactivate other plugins one by one to identify any conflicts. Contact the plugin developers for assistance if you find a conflict.
Best Practices for Store Locator Implementation
Follow these best practices to ensure a successful store locator implementation:
- Plan Your Implementation: Define your requirements and choose a plugin that meets your needs. Plan the structure and design of your store locator page.
- Test Thoroughly: Test your store locator on different devices and browsers to ensure it works correctly. Verify that all store locations are displayed accurately and that the search functionality works as expected.
- Monitor Your Store Locator: Track the usage of your store locator to gain insights into customer behavior. Use Google Analytics or other analytics tools to monitor traffic, search queries, and other metrics.
- Keep Your Store Locator Up-to-Date: Regularly update your store locations to reflect any changes. Ensure your Google Maps API key is valid and that your plugin is updated to the latest version.
- Provide Clear Instructions: Provide clear instructions on how to use the store locator. Make it easy for users to find the information they need.
- Gather Feedback: Ask your customers for feedback on your store locator. Use their feedback to improve the user experience.
Advanced Features and Customization
Beyond the basic functionality, many store locator plugins offer advanced features and customization options:
- Radius Search: Allow users to search for stores within a specific radius of their current location or a specified address.
- Category Filters: Enable users to filter stores by category, such as product type or service offered.
- Distance Calculations: Display the distance between the user’s location and each store location.
- Store Details Pages: Create dedicated pages for each store location with detailed information, such as photos, videos, and customer reviews.
- Appointment Booking: Integrate an appointment booking system to allow users to schedule appointments at specific store locations.
- Click & Collect: Implement a click & collect system to allow users to order online and pick up their orders at a local store.
- Real-Time Inventory: Display real-time inventory information for each store location.
To implement these advanced features, you may need to use custom code or integrate with other plugins. Consult the plugin’s documentation or seek assistance from a WordPress developer.
Conclusion
Implementing a store locator on your WordPress website can significantly enhance the user experience and drive more traffic to your physical stores. By carefully choosing the right plugin, configuring it correctly, and optimizing it for SEO, you can create a valuable tool for your customers and improve your business’s visibility in local search results. Remember to regularly update your store locations and monitor the performance of your store locator to ensure it continues to meet your needs.