
WavePlayer 3.6.2 – Waveform Audio Player for WordPress and WooCommerce
WavePlayer: Seamless Audio Integration for Your WordPress and WooCommerce Site
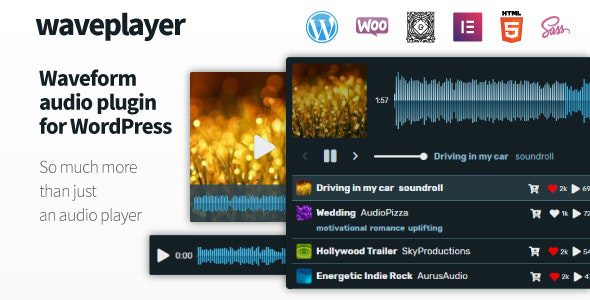
WavePlayer is a powerful WordPress plugin designed to seamlessly integrate waveform audio players into your website. Whether you’re a musician showcasing your tracks, a podcaster sharing your episodes, or an online course creator providing audio lessons, WavePlayer offers a visually appealing and user-friendly solution for delivering audio content directly to your audience. Its compatibility with WooCommerce also unlocks opportunities for selling audio files and creating unique audio-based products. This article will explore the features, benefits, and implementation of WavePlayer, providing a comprehensive guide for users of all skill levels.
Key Features and Benefits of WavePlayer
WavePlayer boasts a wide array of features designed to enhance the audio experience for both website owners and visitors. Here’s a detailed overview of its key functionalities:
- Waveform Visualization: The core of WavePlayer is its visually engaging waveform display. This allows users to quickly scan the audio track, identify key sections, and navigate directly to points of interest.
- Customizable Waveform Colors: Tailor the appearance of the waveform to match your website’s branding with a range of color customization options. You can adjust the colors for the waveform background, progress bar, and playhead.
- Responsive Design: WavePlayer is fully responsive, ensuring a consistent and optimal audio experience across all devices, from desktops to smartphones and tablets.
- Playlist Functionality: Create and manage playlists to group related audio tracks together. This is ideal for albums, podcast series, or audio courses.
- WooCommerce Integration: Sell audio files directly through your WooCommerce store. WavePlayer seamlessly integrates with WooCommerce, allowing you to create and manage audio products.
- Download Option: Enable or disable the download option, giving you control over whether users can download the audio files.
- Looping Functionality: Allow users to loop the audio track for repeated listening, which is particularly useful for learning resources or musical exercises.
- Autoplay Option: Automatically start playing the audio track when the page loads. Use this feature cautiously, as it can be disruptive to some users.
- Volume Control: Provides intuitive volume controls, allowing users to adjust the audio level to their preference.
- Playback Speed Control: Enable users to adjust the playback speed of the audio, making it easier to transcribe audio or review content at a faster pace.
- Shortcode Support: Easily embed audio players into any page, post, or widget area using shortcodes.
- Gutenberg Block: Integrates seamlessly with the Gutenberg block editor, providing a dedicated WavePlayer block for easy insertion.
- Multiple Instances: Add multiple WavePlayer instances to a single page, allowing you to showcase various audio tracks simultaneously.
- Mobile Compatibility: Designed with mobile devices in mind, ensuring smooth playback and intuitive controls on touchscreens.
- Accessibility Features: WavePlayer strives to be accessible to all users, including those with disabilities, by adhering to accessibility guidelines.
The benefits of using WavePlayer extend beyond its impressive feature set:
- Enhanced User Engagement: The visually appealing waveform and intuitive controls encourage users to interact with your audio content.
- Improved User Experience: A seamless and user-friendly audio experience enhances visitor satisfaction and keeps them engaged on your site.
- Increased Content Value: Presenting audio content in a professional and engaging manner adds value to your website and brand.
- Monetization Opportunities: The WooCommerce integration opens up new avenues for monetizing your audio content.
- Simplified Audio Management: WavePlayer simplifies the process of managing and embedding audio files on your WordPress website.
Installation and Setup
Installing and setting up WavePlayer is a straightforward process. Follow these steps to get started:
- Purchase and Download: Purchase WavePlayer from the official website or a reputable marketplace. Download the plugin’s zip file.
- Install the Plugin: In your WordPress admin dashboard, navigate to “Plugins” > “Add New.” Click “Upload Plugin” and select the zip file you downloaded. Click “Install Now” and then “Activate Plugin.”
- Activation: After activating the plugin, you may be prompted to enter your license key. Enter your license key to unlock all the features of WavePlayer.
Configuring WavePlayer Settings
Once the plugin is installed and activated, you can configure its settings to suit your needs.
- Access the Settings Page: In your WordPress admin dashboard, look for the “WavePlayer” menu item (usually located in the left-hand sidebar). Click on it to access the settings page.
- General Settings:
- Waveform Color: Set the primary color for the waveform visualization.
- Progress Color: Choose the color for the progress bar that indicates the playback position.
- Playhead Color: Select the color for the playhead (the indicator showing the current playback time).
- Background Color: Set the background color of the audio player.
- Enable Download: Toggle the download option on or off, allowing or preventing users from downloading the audio file.
- Enable Looping: Enable or disable the looping functionality.
- Autoplay: Enable or disable autoplay. Be mindful of user experience when using this option.
- Show Volume Control: Toggle the visibility of the volume control.
- Show Playback Speed: Enable or disable the playback speed control feature.
- WooCommerce Settings (if applicable): If you plan to sell audio files using WooCommerce, configure the WooCommerce settings:
- Product Audio File Meta Key: Specify the meta key used to store the audio file URL for WooCommerce products. This is crucial for linking audio files to your products.
- Save Changes: After making your desired changes, click the “Save Changes” button to apply the new settings.
Embedding WavePlayer on Your Website
WavePlayer offers several methods for embedding audio players into your WordPress website:
Using Shortcodes
Shortcodes are a simple and versatile way to embed WavePlayer into any page, post, or widget area.
- Upload Your Audio File: Upload your audio file to the WordPress media library.
- Get the File URL: Copy the URL of the audio file from the media library.
- Insert the Shortcode: Use the following shortcode structure, replacing “YOUR_AUDIO_FILE_URL” with the actual URL of your audio file: `[waveplayer url=”YOUR_AUDIO_FILE_URL”]`
- Customize the Shortcode (Optional): You can further customize the shortcode by adding attributes to control various aspects of the player. For example:
- `[waveplayer url=”YOUR_AUDIO_FILE_URL” color=”#FF0000″]` – Sets the waveform color to red.
- `[waveplayer url=”YOUR_AUDIO_FILE_URL” download=”false”]` – Disables the download option.
- `[waveplayer url=”YOUR_AUDIO_FILE_URL” autoplay=”true”]` – Enables autoplay.
Using the Gutenberg Block Editor
If you are using the Gutenberg block editor, WavePlayer provides a dedicated block for easy insertion of audio players.
- Add a Block: In the Gutenberg editor, click the “+” icon to add a new block.
- Search for WavePlayer: Search for “WavePlayer” in the block search bar.
- Select the WavePlayer Block: Select the WavePlayer block to insert it into your page or post.
- Configure the Block: The WavePlayer block will display a field where you can enter the audio file URL. Paste the URL of your audio file into the field. You can also customize the block’s settings, such as the waveform color, download option, and autoplay.
Embedding in WooCommerce Products
To integrate WavePlayer with WooCommerce and sell audio files:
- Create a WooCommerce Product: Create a new product or edit an existing one in your WooCommerce store.
- Add a Custom Field: Use a plugin like “Advanced Custom Fields (ACF)” or “Custom Fields Suite” to add a custom field to your WooCommerce product. This custom field will store the URL of the audio file.
- Configure the Meta Key: In the WavePlayer settings, specify the meta key you used for the custom field in WooCommerce. This links WavePlayer to the audio file stored in the product’s custom field.
- Add the Audio File URL: In the WooCommerce product, enter the URL of the audio file into the custom field you created.
- Embed the Player: On the product page, use the `[waveplayer]` shortcode. WavePlayer will automatically detect the audio file URL from the WooCommerce product’s custom field and display the audio player. You might need to adjust your theme’s template files to ensure the shortcode is rendered correctly. Some themes will automatically render shortcodes in the product description.
Advanced Customization Options
WavePlayer offers a range of advanced customization options for users who want more control over the player’s appearance and functionality.
- CSS Styling: You can customize the appearance of WavePlayer using custom CSS. Target the player’s elements using CSS selectors to modify their styles. This allows you to fine-tune the player’s appearance to perfectly match your website’s design.
- JavaScript API: WavePlayer provides a JavaScript API that allows you to programmatically control the player’s behavior. You can use the API to create custom controls, integrate WavePlayer with other JavaScript libraries, and implement advanced features.
- Theme Integration: You can integrate WavePlayer directly into your theme’s template files for even greater control over its placement and appearance. This requires some coding knowledge but allows for seamless integration with your theme’s design.
Troubleshooting Common Issues
While WavePlayer is designed to be user-friendly, you may encounter some common issues. Here are some troubleshooting tips:
- Audio Player Not Displaying:
- Verify that the audio file URL is correct and accessible.
- Check that the WavePlayer plugin is activated.
- Ensure that the shortcode is correctly formatted or that the Gutenberg block is properly configured.
- Check for JavaScript errors in your browser’s console, as these can sometimes interfere with the plugin’s functionality.
- Audio Not Playing:
- Ensure that the audio file is in a supported format (e.g., MP3, WAV).
- Check that your web server is configured to properly serve audio files.
- Test the audio file in a different browser to rule out browser-specific issues.
- WooCommerce Integration Issues:
- Verify that the meta key is correctly configured in the WavePlayer settings.
- Ensure that the audio file URL is properly stored in the WooCommerce product’s custom field.
- Check for conflicts with other WooCommerce plugins.
- Conflicts with Other Plugins:
- Deactivate other plugins one by one to identify any conflicts with WavePlayer.
- Contact the WavePlayer support team for assistance in resolving plugin conflicts.
If you encounter issues that you cannot resolve on your own, consult the WavePlayer documentation or contact the plugin’s support team for assistance.